

Sourdough 101: How to catch and keep wild yeast
Advice gleaned over four years of much trial and error and loads of research.

Ed. note: This is the third in a series on sourdough.
A sourdough starter is a thing of beauty and seeming magic. All it takes is a bowl of water and flour, and you can ‘catch’ wild yeast from the atmosphere, claiming it as your own to use in everything from a simple loaf of bread to pancakes and pizza dough.
If you’ve never done this before and are relying on commercial yeast packets for your baking projects, I encourage you to give it a try. Not only is the flavor and texture of bread baked with wild-caught yeast far superior, but it’s a lot healthier for you, too. It’s the only kind of bread I can eat without triggering MCAS symptoms. I love bread, so baking with my own sourdough starter has been more than worth the effort to bring it back into my life. As it turns out, the process is also thoroughly satisfying.
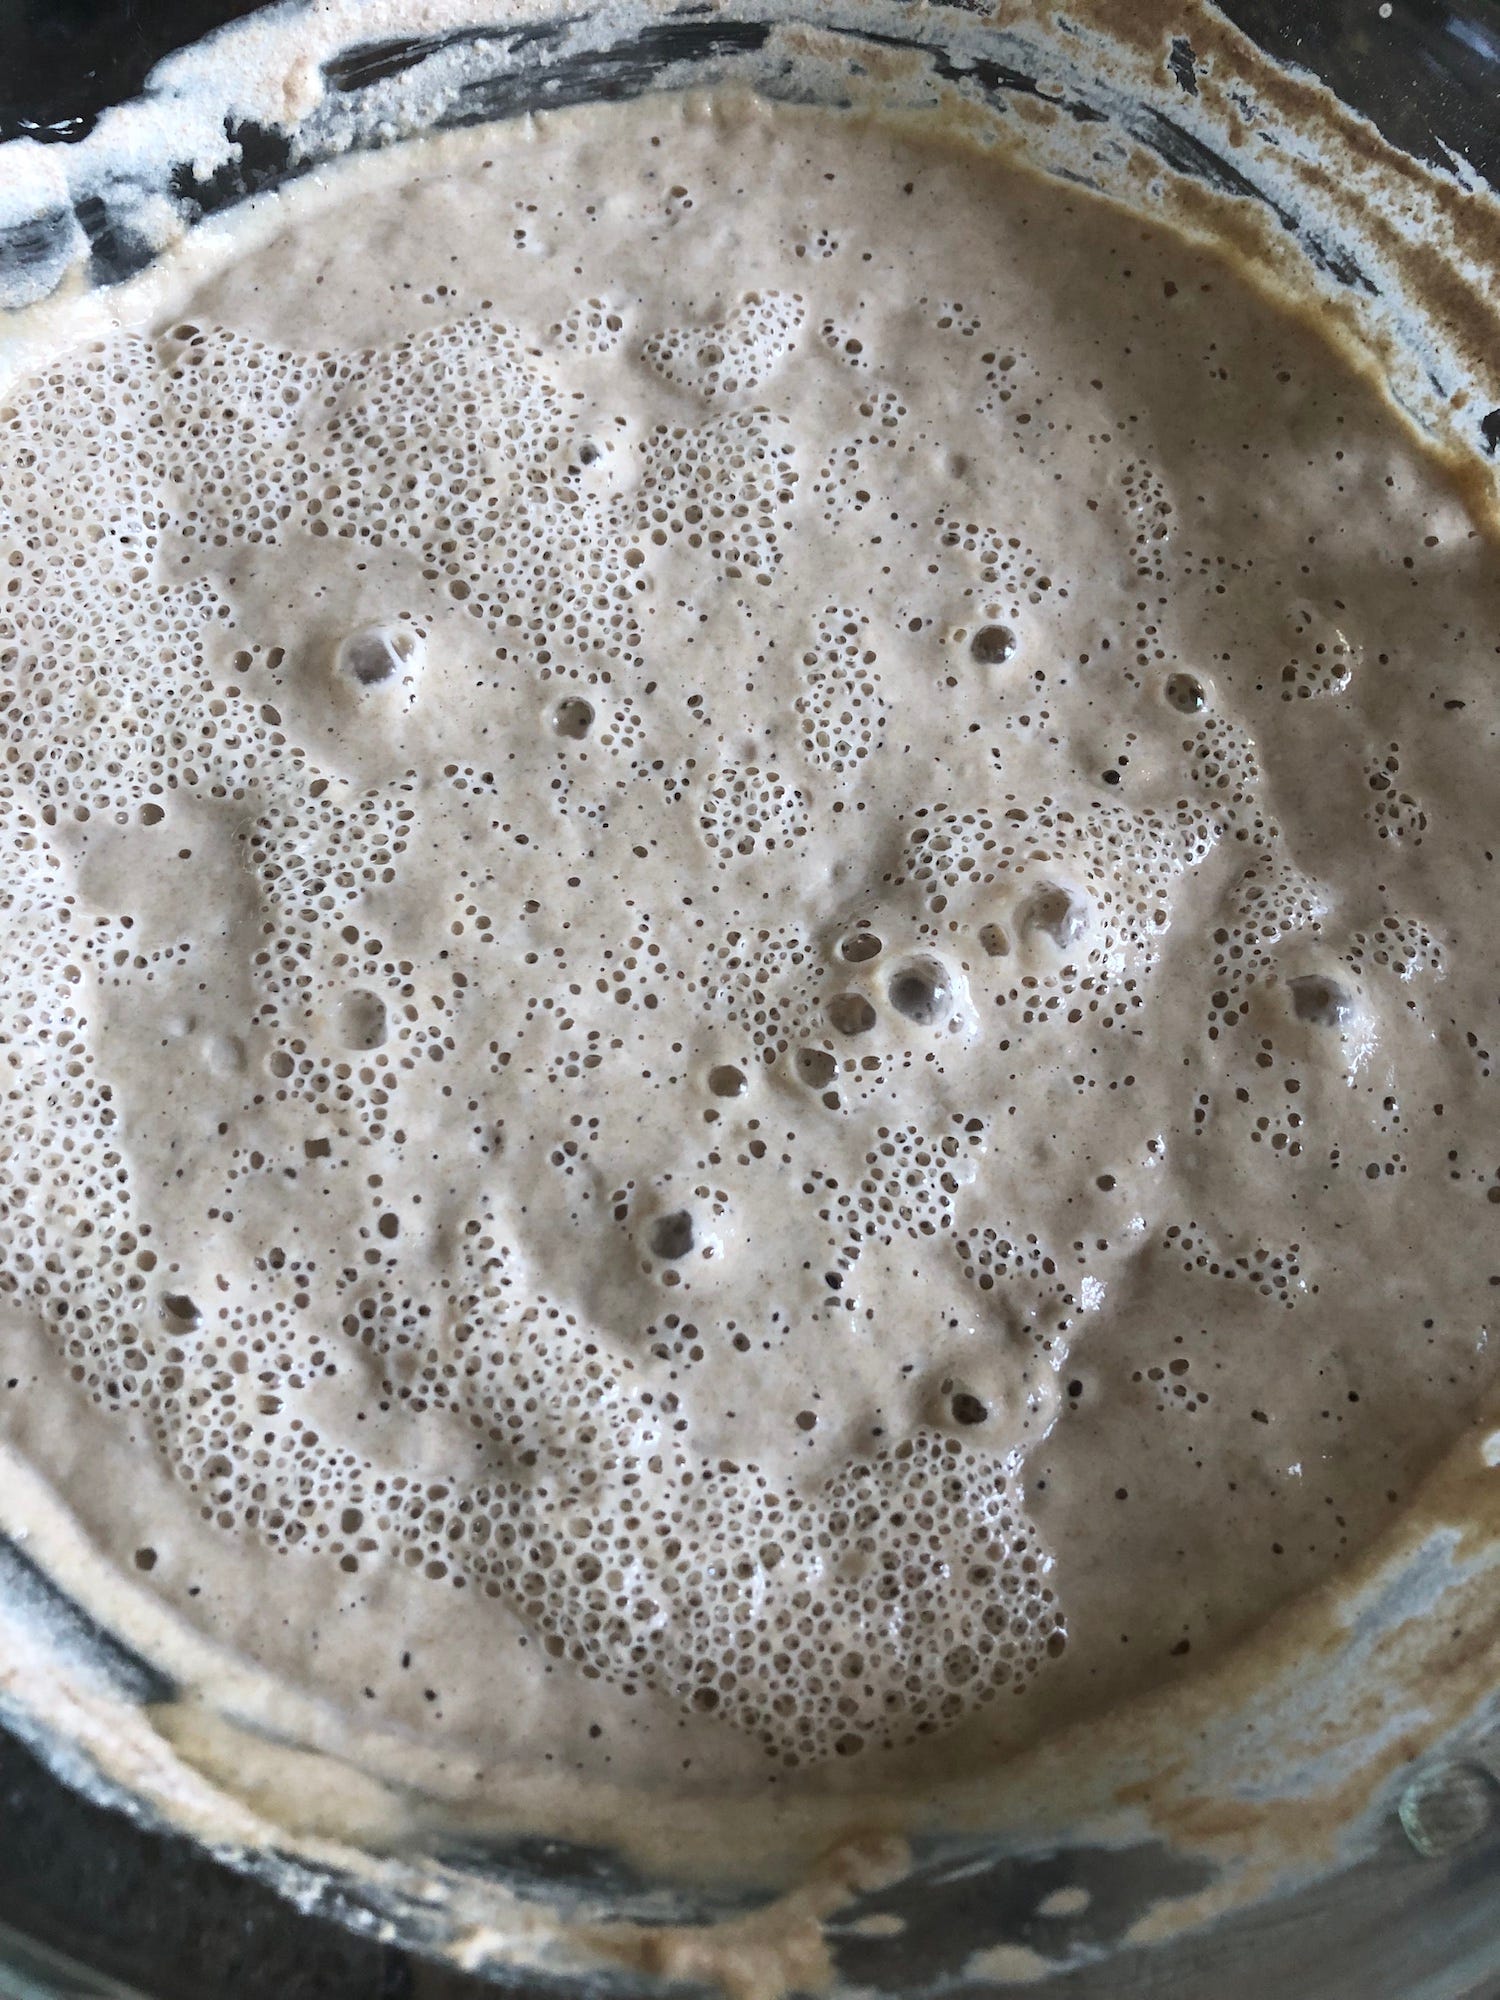
Fall is a great time to start sourdough because yeast thrives in the mildly warm temperature range of 65 to 85°F (18-29°C). Any colder, and it can be tough to capture that yeast; any hotter, and the flour/water mixture can quickly become acidic. I captured my current replacement starter just a week ago.
If you’re not feeling up to it this fall, what with the kiddos clamoring about Halloween, bookmark this post for next spring, which presents another great opportunity. All of my other successful starts were caught in spring, and until I lost that recent one, I’d nurtured it over the course of the past four years, baking with it, letting it go dormant, and then reactivating it to bake again.
It’s something of a miracle that you can stick a flour/water mixture outside and voilá! You’ve got yourself a sourdough starter. Of course, it’s not quite that easy. There’s a fair amount of babying, coaxing, feeding, waiting, babying, coaxing, feeding, and waiting some more until the magic happens.
What didn’t work for me? Random YouTube videos and the advice of some online celebrity food influencers. Unfortunately, the algorithm’s highest-ranking videos trend toward somewhat silly methods that at best fail to rely on the collective historic wisdom of true sourdough artisans and at worst just fail. Many don’t mention the weather or home temperature at all, and a lot of methods lead to unnecessarily wasted flour. Another trendy thing is to urge you to weigh your flour in grams and sell you on digital scales and other equipment. I don’t know about you, but I don’t have time or resources for all of that!
What worked for me was following—but also modifying—the advice laid out in Ed and Jean Wood’s book, Classic Sourdoughs: A Home Baker's Handbook1. We inherited a copy from Anthony’s mother, A. Grace, when she passed in 2011, and it’s just a pity I hadn’t cracked it open sooner.
One of the best things about Classic Sourdoughs is that it educates you on the nature of sourdough so you can adjust and adapt to your own environment. That’s crucial.
My modifications, however, came from reading a couple of other great sources and factoring in their advice. These are Kate Downham’s book A Year in an Off-Grid Kitchen2 and Maurizio Leo’s website The Perfect Loaf. But I promise you, we won’t be measuring anything in grams!
One of the issues I have with influencers is they are either baking every day in commercial kitchens or baking every day in their homes or homesteads because bread is how they earn their, um, daily bread, and their advice reflects that bias. But I can’t bake every day, and I suspect you can’t, either. So this how-to is for the casual baker.
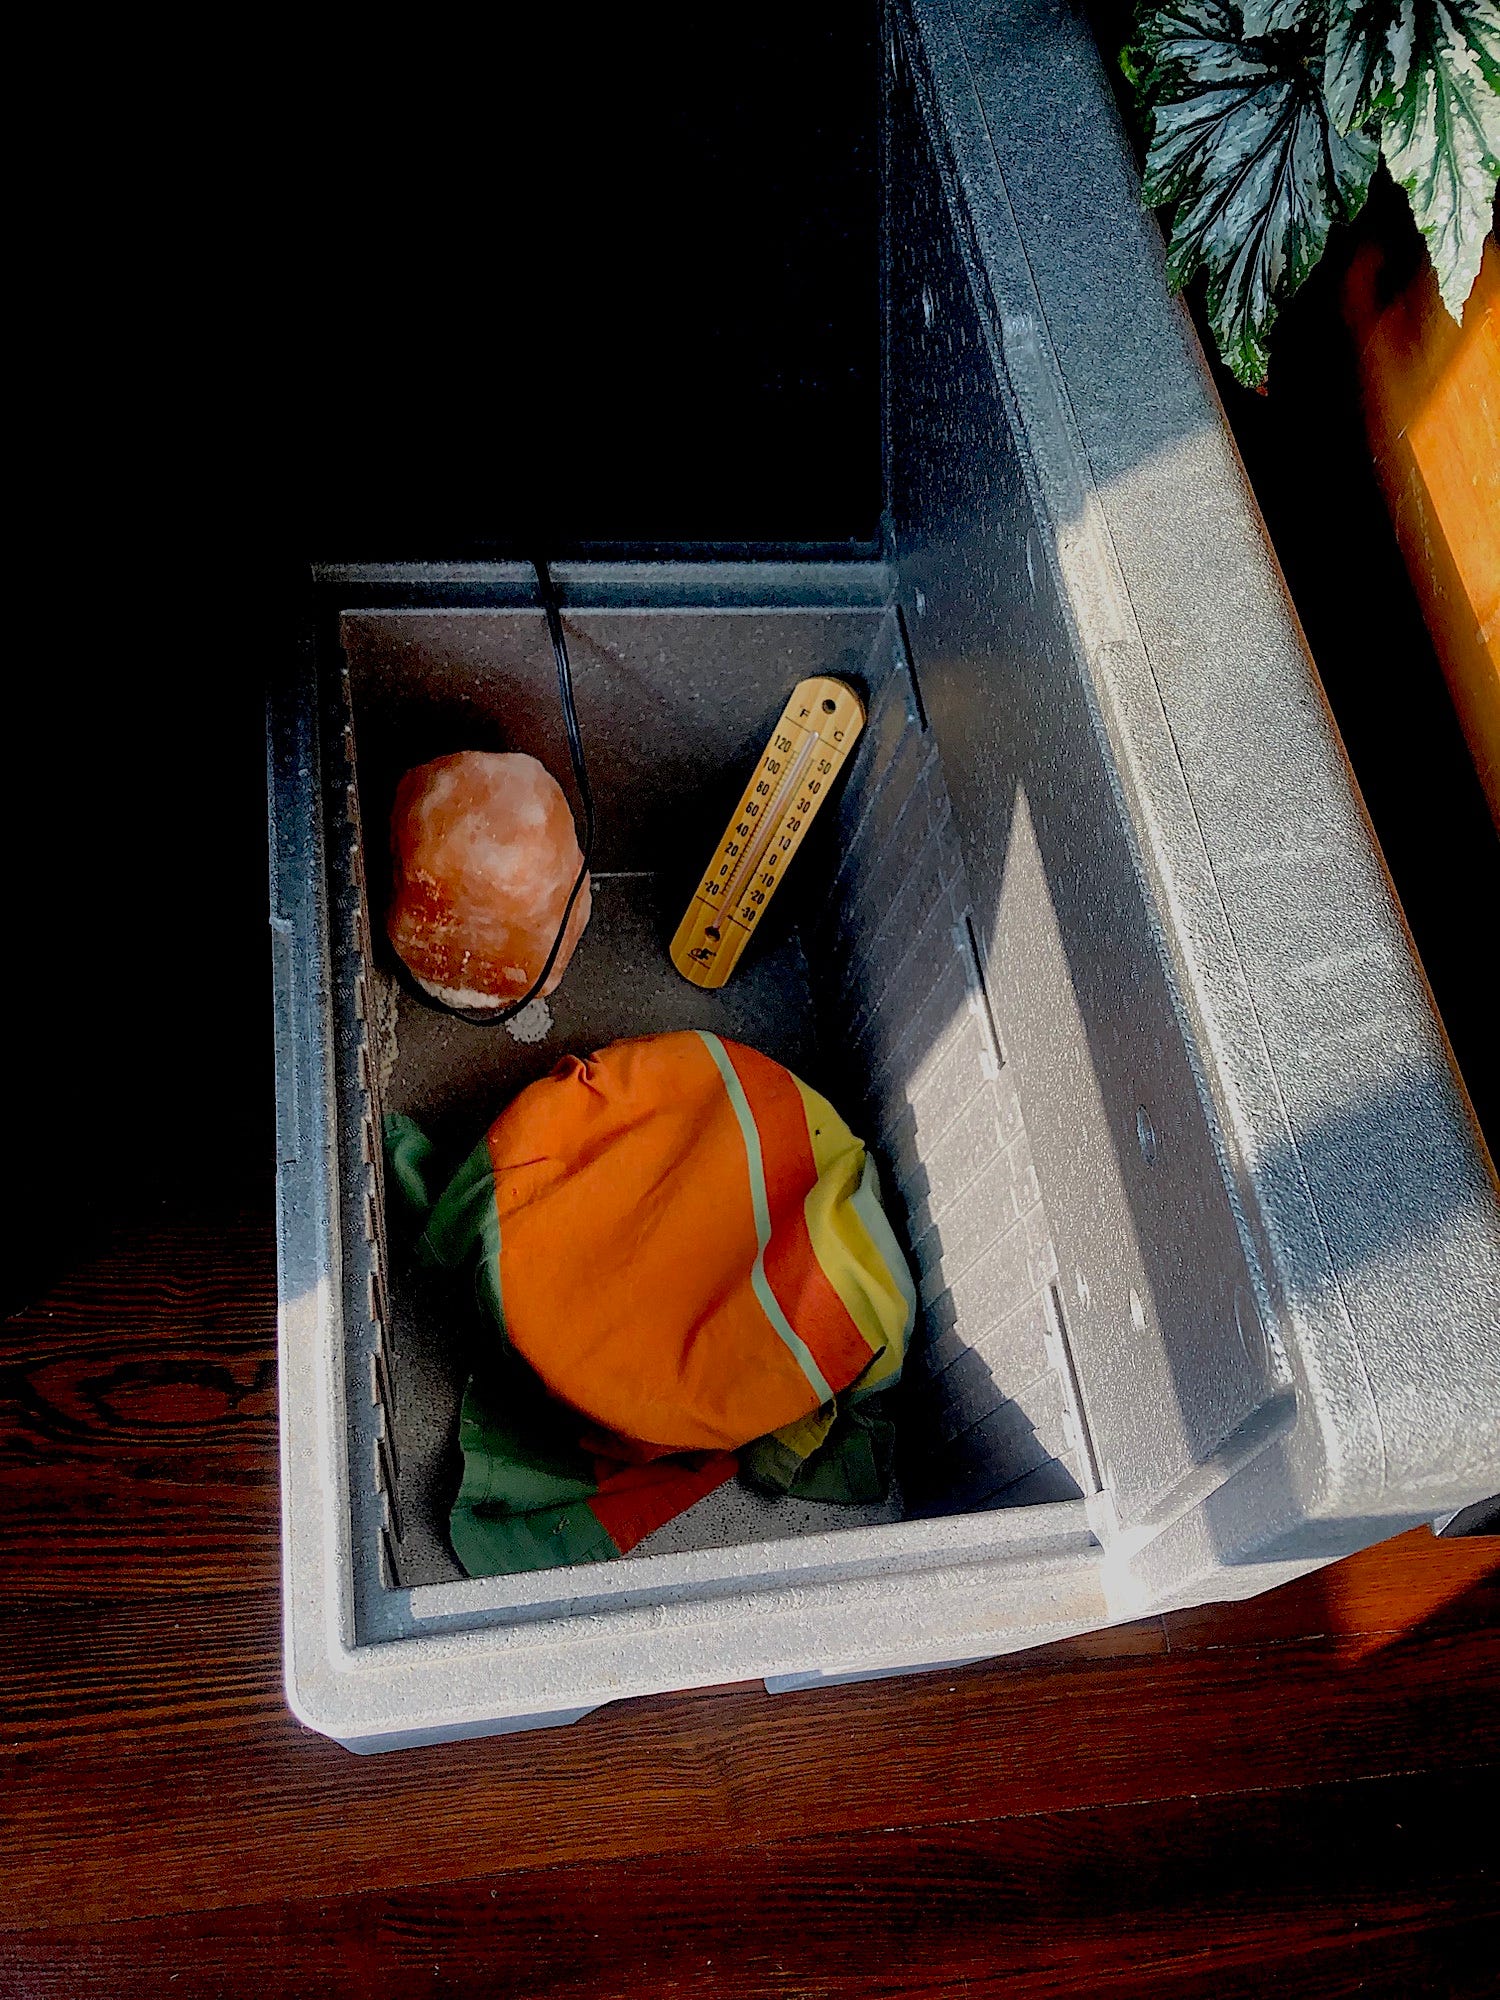
I live in a Midwestern U.S. river town, and even by early October, our air can remain pretty steamy. But luckily, the temperature stayed under 85°F for that week or so that I recently captured a sourdough culture (my fourth). If you’re in a more northern area, you might need to create a proofing box, which you can do with a standard Styrofoam cooler and socket light. I kluged one together using a Himalayan salt lamp. Pro tip: This doubles as a haybox cooker.
You can also put your mixture in the microwave (don’t turn it on, though!) with a measuring cup full of hot water, which will keep it warm. Another method is to place it in the oven (don’t turn it on, though!) with the light on, which will generate enough ambient heat.
But if you’ve got a lovely autumn range of 65-85°F (18-29°C), you should have no problem starting your culture. I strongly recommend doing this outside, as indoor air can be drier, less biodiverse, and laden with household contaminants, especially if you don’t have the windows open.
If you can’t do this outside, though, no worries. Try the proofing-box methods above, whether you’re working with an old cooler, the microwave, or your oven with the light on. If you use a cooler with a light like my Himalayan salt-lamp pictured above, just be careful that you’re not using too hot a lamp, are creating a situation that doesn’t support your culture, or is in any way a fire hazard! I place a thermometer in the box and prop the lid open to keep it from getting too hot, as well as provide airflow.
