Your basic sauerkraut
A powerful superfood we eat almost daily.
If the word “sauerkraut” takes you only to shelf-stabilized jars of that greyish mash brought out for Oktoberfest sausages, we’re here to blow your mind.
Sauerkraut is, oh, so much more.
If done in the traditional manner through lacto-fermentation, sauerkraut is an effervescent dish full of golden, crunchy laces of delectably sour cabbage. It’s delicious on its own but can also accompany a great many menu items far beyond the sausage roll, though that’s yummy, too. We’ve paired sauerkraut with breakfast eggs, lentil stew, a wide variety of meats from beef to lamb, and more.
It’s also insanely easy to make, requiring just two simple ingredients: cabbage and salt. You don’t need to rush out and get any special equipment, either. While we’re partial to our 5-gallon crock and these handy fermentation kits, you can make it using your own two hands and a couple of old jars.
And that’s true no matter what shape you’re in. We recently gave Lisa’s mother a live sauerkraut demo, and she’s 76. Elder Brunette was worried about her arthritis limitations, but she managed the process just fine.
The vastly superior taste of lacto-fermented sauerkraut is reason enough to make it this way rather than boiling the cabbage or using vinegar. But by now you’ve undoubtedly heard of the role lacto-fermented vegetables play in our gut health. The “lacto” here doesn’t come from dairy but from lactobacillus, a type of bacteria present on most living things and naturally part of the ecosystem clinging to fresh fruit and vegetables. By preparing the cabbage with salt and a little friendly crushing, you encourage these critters to take hold, discouraging their less-desirable neighbors, and the helpful bacteria preserve the cabbage for you.
It’s a miracle, when you think about. Before refrigeration or modern medicine, somehow nature worked out this ingenious method not only for preserving foods that would otherwise spoil but for boosting human beings’ health.
If you’re not lacto-fermenting your produce, you’re missing out on this magical aspect of life on planet Earth.
Here’s how to do it.
Get these
One or more heads of cabbage. We encourage you to grow your own, though in all honesty, we struggle with cabbage in our hot climate, and they take up a lot of garden space. We buy them from a local farmer.
Tip: Don’t use Chinese or Napa cabbage. Red cabbage works but changes the sauerkraut to something equally good yet different. We suggest starting with a European green cabbage. After you’ve had some success, you can see what other types of cabbage you might want to try and branch out into the whole world of vegetables after that. We’ve found that for the ceramic sauerkraut crock, it takes about three large- or four medium-sized cabbage heads to fill it.
Salt. We recommend non-iodized sea salt. Any type of salt will work, but some say additives and processing can introduce elements that kill the good bacteria.
A large bowl.
Jars or a crock. Basically, you need something for the cabbage to sit in while it ferments. Crocks are great for large quantities of kraut, and they often come with ceramic weights to keep the cabbage below the brine. Once it’s done fermenting in a crock, you can transfer it to mason jars or some other jars that will seal. We recommend if using jars that you save an old “skinny” jar from olives or sauce that fits right down into the top of a mason jar, sliding in with little room on the sides.

Something to tamp down the cabbage in the jars. The sauerkraut kit we love comes with a handy wooden tamping dowel. But it would only take a bit of creativity to come up with a reasonable substitute. You can also use your own knuckle power!
Optional: a high-tannin leaf, such as grape, oak, or horseradish. You’ll top the kraut with them, which helps discourage unwanted bacteria, yeast, and mold. This might also help your ferment last longer, as the one time we forgot the leaf on top, the upper-most kraut wasn’t as crunchy as the bottom after 6 months in our basement storage.
Now do this
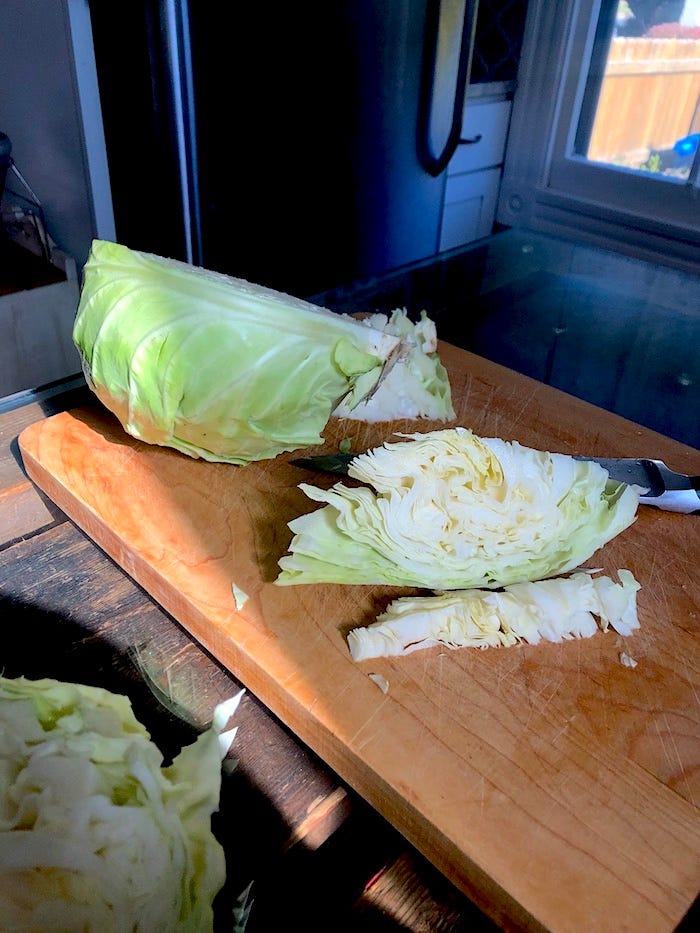
Core and shred the cabbage. First cut the cabbage in half and then cut the core out that sits at the bottom of the cabbage. Once that is done, cut the cabbage into thin strips.
Tip: We don’t usually run it through a food processor. First, cutting the cabbage in half and coring it needs to be done with a knife and cutting board, so you’re going to have those out anyway. Second, most food processors can’t handle the size of half a cabbage, so you’re going to be cutting the cabbage down to get it into the food processor. By that time, you’ve done so much of the work that the food processor isn’t going to save you much effort. Finally, we’ve found that a food processor, even set at the widest setting, shreds the cabbage too fine. It also tends to be messy, and you end up losing a lot of cabbage. However, if you don’t mind smaller threads and want the extra assistance in the form of machine power, by all means, use one.
Put the cabbage in the bowl.
Tip: Don’t put the bowl in the cabbage.
Add salt. Here is where it gets a bit intuitive. We’ve seen recommendations for everything from 10 cups of cabbage to one teaspoon of salt to 7 cups of cabbage to two teaspoons of salt. The first seems a bit light on the salt, and when you crush it, you might not get much brine. The second seems a bit salty to us. We usually go with about 8 cups (2 L) of cabbage to one teaspoon (5 ml) of salt.
Tip: If it does not produce brine when you crush it, you can always add more salt.
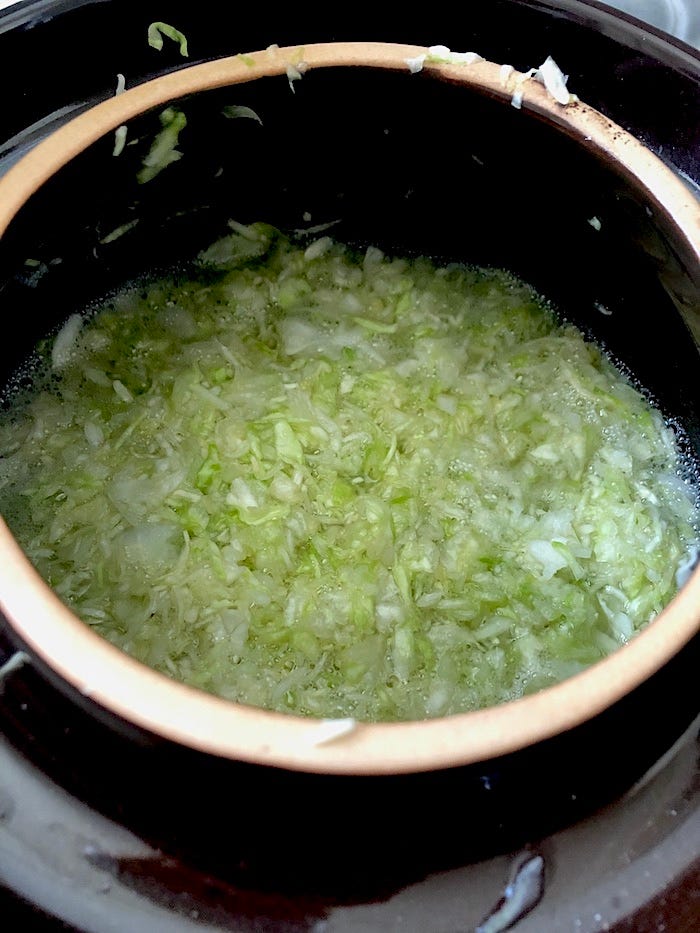
Crush the cabbage. Most recipes say “massage” the cabbage, but that’s a mis-leading term. What you are doing is grabbing fistfuls of cabbage, crushing it in your hands, and then dropping it back into the bowl and repeating this process. Once the cabbage has softened and you have a good bit of brine in the bowl with the cabbage, you’re done.
Tip: If you have weak hand strength, you can use your body weight and crush the cabbage against the bottom of your bowl. Just set the bowl on a table or some low surface so you can lean over it.
Here’s a demo of the crushing action; you can also hear the suck of the brine:
Now put the cabbage into your jars(s) and/or your crock. You want to pack it down with your fists, knuckles, or tamping device until enough brine comes to the top of the jar/crock that the cabbage is submerged. Leave a good half inch of fluid on top of your cabbage and another half inch of empty space before the top of the jar. If you are using a crock, go for a full 1-2 inches (25-50 ml) in both cases.
Place the high-tannin leaves on top, if you’re using them, tucking them under the brine. Then place the weights over those. Lid and add water to the crock if it’s the water-seal kind. If you’re using the fermentation kit, the soda glass goes on top of the leaves or top layer of kraut. Place the silicone burping nipple over that, with the mason-jar ring sealing it in place. If you’re using a “skinny” jar, it goes on top of the leaves/top kraut layer, too. If the jar isn’t heavy enough, you might have to fill it with water to weigh it down.
Tip: Make sure everything is clean, but sterilization isn’t necessary and might even inhibit the lactobacillus.
Place the jars/crock in a dark area that keeps a fairly even temperature. If it’s on the warm side, the fermentation process might take only a few days. If it’s cooler, it could take two weeks or even longer. We keep ours in a basement that ranges between 55 and 70 degrees F (13-21°C) depending on the time of year. Most often, it’s about 65°, and we tend to go a week and a half.
Tip: Here is the one area where having specialized equipment is really handy. You must release the gases that your fermenting cabbage produces. The gas needs to escape about once a day or once every other day—this is called burping—depending on how fast your fermentation process is going.
If you used a jar within a jar, the gas will escape out through the sides you left exposed. A crock has a water airlock that allows the gases to escape but doesn’t let other things get into the crock.
The fermentation kit we use includes soda-glass weights and silicon tops with nipples that burp while your kraut is fermenting. These will save you some time and hassle. While some say the silicone nipples become coated in brine and can close up, blocking the burps, we’ve never once had any of them close up on us, and we’ve used them for years now to ferment everything that wasn’t in crock quantity. If you’re worried about this, you can pinch the nipples (ha, ha) whenever you check on your ferments, which, if you’re like us, is often.
Taste-test your sauerkraut. That is really the only way to know when it’s done. We tend to jar our kraut for storage when it’s just slightly less tangy then we want it, as it will ferment just a bit more once it’s on the shelf. When the kraut is where you want it, transfer it from the crock to clean jars. Once again you want to press it down firmly, using your fists, knuckles, or a tamper. If you’re using jars from the beginning, the process is simpler since you don’t have to transfer the kraut, but make sure the lid and the top of the jar are clean before you seal it.
Tip: Once it’s sealed, label the jar with the date and ingredients. You think you’ll remember, but you don’t want to be standing there half a year from now wondering how old your kraut is or if it’s even supposed to be kraut!

Many people will tell you to store your fermented vegetables in the refrigerator. Some folks have the space and resources for a second fridge just for ferments. We have neither. We also think it’s redundant to use this preservation method that worked for thousands of years before refrigeration only to then resort to… refrigeration.
Our sauerkrauts typically last 4-6 months in basement storage at 55-70°F (13-21°C). Once we’ve opened it and begun to eat it, we move it to the refrigerator. But please exercise due caution, follow the guidelines for your particular climate and per your preference, and check out our notices and policies on this point.
Next week, Kirsten K. Shockey of Fermenting Change joins us for a Q&A about the 10th-anniversary relaunch of her classic book Fermented Vegetables. We’ll also be giving away a free print copy of the new, updated edition to one of our paid subscribers.
Does all this make sense? Or are the two of us crocked off our krauts?
For paid subscribers: A handy PDF of this recipe below the paywall.


